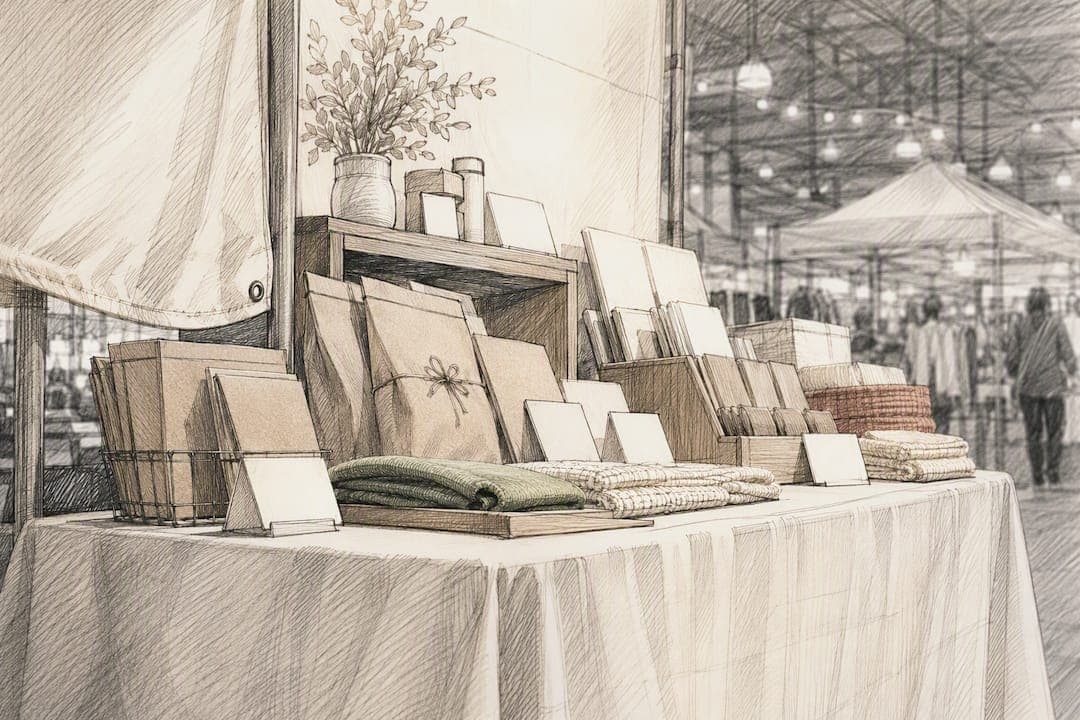
Craft fair booth branding is the set of repeated visual and verbal choices, name, colors, fonts, and story, that make your booth instantly recognizable and give shoppers a reason to find you again after the show. Before your next event, do three things: hang a large, legible name banner, cover your table in one solid brand color, and post clear price tags with a business card or QR code nearby. Everything else in this guide builds on those three moves.
TL;DR:
- Consistent use of a small color palette across signage, table covers, and packaging accelerates recognition and reduces costs for new vendors.
- Proper staging with height, logical grouping, and focal points enhances product visibility and encourages browsing and sales.
- Signage should prioritize readability at a distance, with clear, high-contrast price tags and focused messaging for quick impressions.
- Incorporating branded apparel, secondary merchandise, and themed props reinforces your story and extends your booth's visual identity beyond the table.
- Cost-effective web and print tools can support professional-looking branding, packaging, and signage without needing a full design team.
Table of Contents
- What Are the Core Elements of Craft Fair Booth Branding?
- How Should You Stage Your Booth for Maximum Impact?
- How Do You Design Signage People Can Actually Read?
- Packaging and Unboxing: The Small Touches That Get Remembered
- Does Vendor Appearance Really Affect Your Booth Branding?
- Where Should You Spend Your Branding Budget First?
- What's a Simple Show-Day Setup Timeline?
- Using Lighting to Highlight Your Products and Branding
- Should You Add Interactive Elements or Demos to Your Booth?
- How Do You Keep Your Social Media Branding Consistent With Your Booth?
- Do Themed Decorations and Props Actually Reinforce Your Brand?
- Sincerely Skye's Take: Apparel and Merch as Booth-Brand Multipliers
- Where to Go for Print, Design, and Packaging Help
- Sources
What Are the Core Elements of Craft Fair Booth Branding?
Good booth branding comes down to five decisions you make once and then repeat everywhere. Skip the temptation to design something new for every show. Consistency, not novelty, is what makes a booth memorable.
Start with color. Pick a small set of core brand colors and use them consistently on your banner, tablecloth, price tags, and packaging every single time. Vendors who commit to a tight, repeated palette build recognition faster than those who mix things up for seasonal fun, and a locked palette also happens to be the cheapest fix available to a new vendor.
Next comes your name. You don't need a logo designer. A simple wordmark, your business name typed in one clean font, works fine on a banner, and you can scale a smaller version down for tags and stickers. Avoid script or decorative fonts below 20 point size; they blur into illegible squiggles from ten feet away.
A few practical rules for pulling this together:
- Choose one primary font for headlines and one secondary font for details; never mix more than two.
- Match your booth colors to your website and social media so shoppers recognize you online later.
- Write a one-line story or tagline ("Hand-stitched in small batches since 2019") and display it on a small sign near your register.
- Keep your logo simple enough to read at three inches tall on a price tag.
That one-line story matters more than most vendors think. It gives browsers a reason to stop instead of just glance, and it gives you something to say when someone picks up an item and pauses.
How Should You Stage Your Booth for Maximum Impact?
Staging is where branding turns into sales. A cohesive banner and color palette mean nothing if your table looks like a flat, cluttered yard sale.
- Set your focal point first. Your banner or a tall backdrop piece should sit at eye level, aligned with your best sellers, so it's the first thing a passerby's gaze lands on.
- Build height with risers. Wooden crates, tiered stands, or simple shelving lift some products above the table plane, and vertical display choices depend on your product type and the length of the show: a boutique arrangement with breathing room suits higher-priced items, while stack-it-high works for small, low-cost goods people grab on impulse.
- Group with logic. Cluster by collection, price point, or use case, not by whatever fit in the box you unpacked first.
- Map the customer path. Decide where people will stop, where they'll touch a product, and where they'll pay, then keep that checkout zone visible but free of your storage bins.
Pro Tip: Leave one item slightly separated from the rest with its own small riser. Isolation draws the eye, and it's the fastest way to spotlight a new or higher-margin piece without saying a word.
How Do You Design Signage People Can Actually Read?
Your banner has one job: get read from far away. Aim for lettering tall enough to see clearly from 10 to 20 feet, and keep your business name as the dominant element, not a logo mark nobody recognizes yet.
Price signs need different rules. Shoppers form an impression of a booth in about three seconds, so every sign should carry one idea, not a paragraph. High contrast (dark text on a light background, or vice versa) beats clever typography every time.
A few formatting habits that consistently work at craft shows:
- Individual price tags: item name, price, and a one-line descriptor ("Hand-thrown mug, dishwasher safe," $28).
- Place tags where a browsing hand naturally lands, not tucked underneath the item.
- Use a single menu-style sign for repeatable goods sold at one price (stickers, prints, small ornaments) instead of tagging each piece individually.
- Reserve individual tags for one-of-a-kind or higher-priced items where shoppers expect more detail.
Menu-style signs save you setup time and reduce clutter for fast-moving inventory. Save the individual tag treatment for anything unique enough to deserve its own line of text.
Packaging and Unboxing: The Small Touches That Get Remembered
A branded bag, a wax-stamped sticker on tissue paper, or a simple kraft box with your logo does more than protect the item. Packaging functions as a small unboxing experience that reinforces perceived quality and gives buyers a reason to remember where the item came from.
Slip a business card or a QR code linking to your shop into every sale, no exceptions. It costs pennies and it's the single easiest way to turn a one-time craft fair buyer into a repeat online customer.
For low-volume sellers, DIY workflows keep this affordable:
- A rubber stamp with your logo turns plain kraft bags into branded packaging for under $30.
- Printable sticker sheets from a home printer work fine for one-off shows; order a bulk run once you know your seller volume.
- Thank-you cards with your handle and website cost less than a dollar each when printed at home.
- Tissue paper in your brand color adds a boutique feel with zero design work.
Packaging also lets you hold your price. A $32 mug wrapped in tissue with a branded sticker reads differently than the same mug handed over in a plastic grocery bag, even though the product hasn't changed at all.
Does Vendor Appearance Really Affect Your Booth Branding?
Yes, and it's the branding element vendors skip most often. Vendor attire functions as an extension of your brand, which means what you wear behind the table is part of the display, not separate from it.
You don't need a full uniform. One branded apron or a well-made tee in your palette does more than five mismatched pieces, and comfortable, brand-aligned clothing also builds shopper credibility simply by looking intentional rather than thrown together.
Match your style to your product line: minimal jewelry and neutral tones for a minimalist ceramics booth, more color and playfulness for a whimsical sticker or apparel line.
- Closed, cushioned shoes for standing eight or more hours on concrete.
- Layers you can add or shed as tents heat up or cool down.
- Pockets or a small apron pouch for cash, cards, and a phone.
- One consistent branded piece worn at every show, not just the big ones.
Pro Tip: Buy your branded apparel piece before your banner if your budget forces a choice. You wear it at every show for years, while a banner eventually needs reprinting anyway.
Where Should You Spend Your Branding Budget First?
Small budgets do the most good when they're spent in the right order.
- Banner first. A large, high-visibility name banner is the single highest-impact purchase a new vendor can make, and local print shops or online banner printers typically deliver one for $30 to $80.
- Tablecloth second. A solid-color cloth in one of your core colors instantly unifies a booth that previously looked like mismatched furniture.
- Price signage third. Clear, consistent tags cost almost nothing to produce yourself with cardstock and a good marker or a home printer.
Beyond that, phase upgrades across your next two or three shows rather than buying everything at once. Add risers at show two, upgrade packaging at show three. You don't need a design background to pull this off; free template tools cover wordmarks and signage just fine until your revenue justifies hiring a designer for a polished logo.
What's a Simple Show-Day Setup Timeline?
A rushed setup is where branding falls apart. A timed sequence keeps you on track even under a tight load-in window.
- 60 minutes out: Hang the banner first. It anchors your booth's orientation and everything else gets arranged around it.
- 30 minutes out: Cover the table in your branded cloth, then position risers and shelving.
- 15 minutes out: Place products by group, set price tags, and stage your packaging supplies within reach.
- 0 minutes: Do a final walk-around from the customer's side of the table, checking sign visibility and clearing your checkout area.
Pack binder clips or fishing line for windy outdoor shows. A banner that flaps loose ruins your focal point in seconds. After teardown, post one photo from the show to social media and remind your list to sign up for updates while the day is still fresh in shoppers' minds.
Using Lighting to Highlight Your Products and Branding
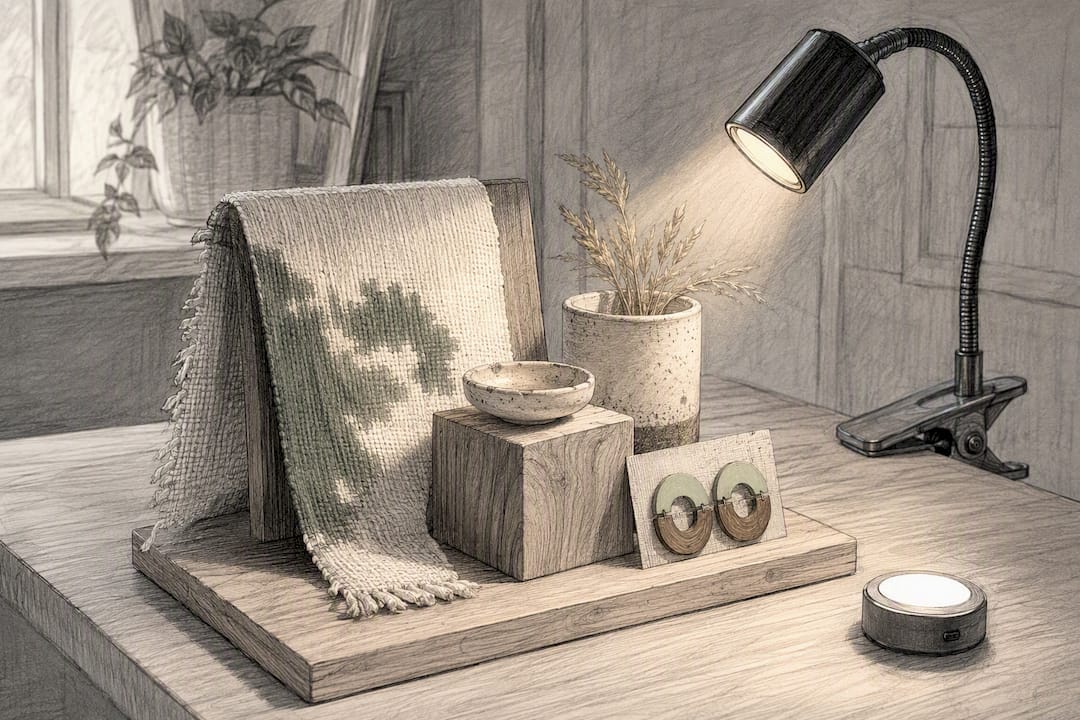
Indoor craft fairs often have flat, uneven overhead lighting that makes handmade goods look duller than they are in person. A small clip-on LED light or a battery-powered puck light aimed at your focal display can lift color and texture enough to stop a browser mid-stride.
Warm white bulbs (around 2700K to 3000K) flatter most handmade goods better than cool blue-white light, which tends to wash out warm tones in wood, ceramics, and dyed textiles. If you sell jewelry or anything with reflective detail, a focused beam rather than broad ambient light makes stones and metal catch the eye from several feet away.
Battery-operated string lights along a backdrop or shelf edge add a soft glow without needing an outlet, which matters at outdoor markets where power access is limited or nonexistent. Keep the light color consistent with your brand palette. If your booth runs warm and cozy, cool blue LED strips will fight that feeling instead of supporting it.
Test your lighting setup at home in dim conditions before the show. What looks bright in your well-lit kitchen can look weak under a shaded tent, and you won't have time to troubleshoot once customers start arriving.
Should You Add Interactive Elements or Demos to Your Booth?
A booth that only displays finished products asks a lot of a stranger walking by: to imagine the process, the material, the effort. A quick demo removes that guesswork.
If you make jewelry, keep a small station where you're visibly wire-wrapping or stringing beads. Candle makers can melt wax samples so people smell the scent before buying. Even a simple "guess the material" card next to an unusual piece invites a conversation that a silent table never will.
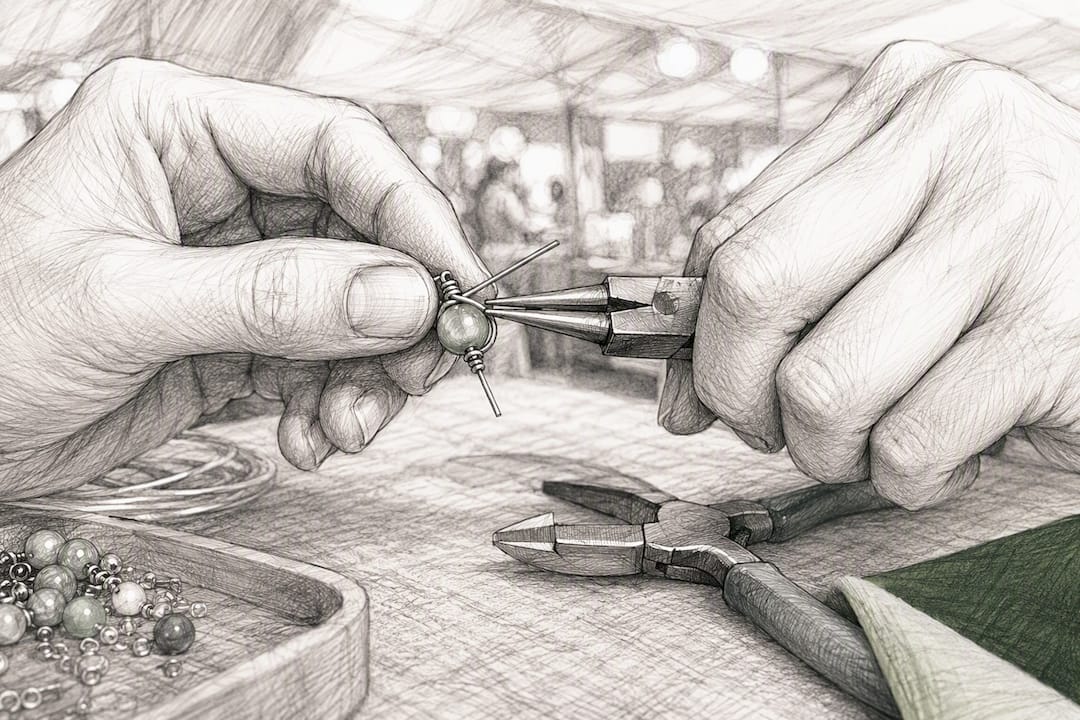
Demos work because they slow people down. A shopper who stops to watch you work for thirty seconds is far more invested than one who glances at a static table and keeps walking. That pause is also your best chance to mention your story, your materials, or your process, the same branding message from your signage, just delivered in person.
Keep any interactive element small and low-mess. You still need room for actual selling, and a demo that eats your whole table space defeats the purpose. A single sample tray, a small tool setup, or a "try it" card works better than an elaborate station that slows down the line at checkout.
How Do You Keep Your Social Media Branding Consistent With Your Booth?
A booth that visually matches your online presence makes it easier for shoppers to find and trust your shop after the show ends. If your Instagram feed is soft pastels and hand-lettered fonts but your booth banner is bold primary colors, you've created two different brands without meaning to.
Use the same color palette, the same logo version, and the same photography style (bright and airy, or moody and warm, pick one) across your booth signage and your feed. Post a photo of your actual booth setup before each show; it gives followers a preview and gives in-person shoppers something familiar to recognize once they search your handle later.
Include your social handle on every price tag or business card, written exactly as it appears online, so there's no guessing or misspelling involved. Consistency here is what turns a single craft fair sale into a follower who buys again from your online shop months later.
Do Themed Decorations and Props Actually Reinforce Your Brand?
Yes, when they support your story instead of distracting from it. A vintage crate, a repurposed ladder shelf, or a specific prop tied to your craft's origin (a spinning wheel next to handspun yarn, an old typewriter next to letterpress cards) gives shoppers a visual shortcut to understand who you are before reading a single sign.
The mistake most vendors make is treating decorations as decoration rather than branding. A prop should echo your color palette or your one-line story, not just fill empty table space. If your tagline mentions "vintage-inspired," a genuinely aged object does more work than a plastic imitation.
Seasonal props deserve the same discipline. A fall-themed booth with pumpkins and warm lighting works, but only if the colors still align with your core palette rather than clashing with your usual banner and packaging. Swap decorations by season if you want, but keep your brand colors, fonts, and signage fixed underneath them.
Sincerely Skye's Take: Apparel and Merch as Booth-Brand Multipliers
Here's what most vendors underestimate: what you wear and sell isn't separate from your booth branding, it's an extension of it. A branded apron or tee worn all day is a walking sign that keeps working after the show ends. A tote bag or sticker sheet at checkout does double duty as packaging and as portable advertising once that buyer carries it into their own daily life.
Small merch touches (a well-designed tote, a sticker that survives a water bottle) turn a single sale into repeated exposure. If you sell apparel-adjacent goods yourself, treat pieces like the Craft Now, Clean Later tee as inspiration for how a simple, well-branded design travels far beyond your booth table. For outfit-specific guidance, our holiday craft fair outfit guide and tote organization post go deeper on execution.
— Skye
Where to Go for Print, Design, and Packaging Help
You don't need to hire a full design team to execute any of this. Free tools like Canva handle wordmarks and printable price tags without a learning curve, and most local print shops or online banner services can turn a simple file into a finished vinyl banner within a few days.
For packaging supplies, craft-specific suppliers carry stamps, kraft bags, and sticker sheets at prices that make small-batch branding realistic on a tight budget. If you want more on the display mechanics behind vertical staging and product grouping, Fine Woodworking's guide to marketing and displaying goods at craft fairs covers the boutique versus stack-it-high decision in more depth. For sticker application specifics on packaging, our sticker placement guide walks through quick layouts that hold up during handling and shipping.
Sources
- Vendor branding: grow your presence & sales
- Craft Booth Branding: How to Build a Brand That Makes Your Booth Unforgettable in 2026
- Crafts Fairs: Marketing, branding, and displaying your goods