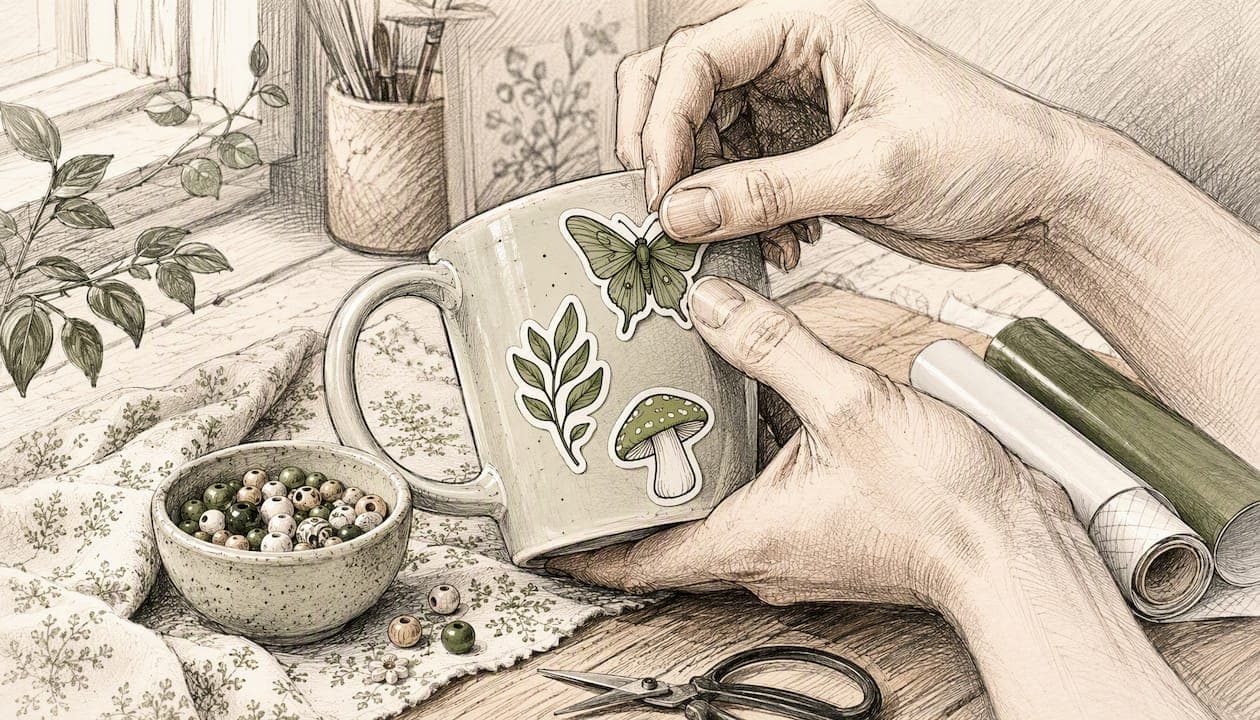
The best surfaces for stickers are smooth, clean, and dry: laptop lids, water bottles, phone cases, planners, car windows, luggage, mirrors, fridges, helmets, and instrument cases all work well. The one rule that covers almost every situation: stick to vinyl for anything that gets handled, wet, or taken outdoors, and save paper stickers for short-term indoor use. That single material decision prevents most peeling problems before they start.
A few quick examples to get you oriented:
- A vinyl sticker sized appropriately centered on a laptop lid reads like a statement piece, while a cluster of smaller accents in the bottom corner fills space without competing.
- Waterproof water bottle stickers sit best on the flat midsection of a tumbler, away from the base where condensation pools.
- A row of small paper stickers along the top edge of a planner cover creates a clean border that stays put through daily use.
Pro Tip: Before pressing anything down permanently, wipe the surface with rubbing alcohol and let it dry for 60 seconds. Oils and dust are the top reasons stickers peel early.
Key Takeaways
The most durable sticker placements combine smooth, clean surfaces with vinyl materials and a deliberate layout strategy chosen before anything is pressed down.
| Point | Details |
|---|---|
| Surface rule | Smooth, clean, dry surfaces hold stickers best; prep with rubbing alcohol before applying. |
| Material choice | Use outdoor or laminated vinyl for bottles, gear, and vehicles; paper stickers for short-term indoor use only. |
| Layout strategy | Choose one approach (focal, corner cluster, grid, or diagonal) before placing any sticker. |
| Removal and care | Hand-wash stickered bottles; use heat and a low peel angle for clean removal with no residue. |
| Sincerelyskye | Outdoor vinyl stickers and craft-themed designs from Sincerelyskye suit laptops, tumblers, and planners. |
Table of Contents
- Great sticker placement ideas for tech and everyday carry
- Decorating paper goods: notebooks, journals, and planners
- Sticker ideas for travel gear, helmets, and hard cases
- Home decor sticker placement: mirrors, walls, and more
- Vehicle and instrument case placement: what actually works
- How to plan sticker layouts that look designed, not random
- Which sticker materials actually hold up by surface
- How to apply a sticker without bubbles or crooked edges
- Removing stickers and dealing with residue
- DIY workflow for making durable custom stickers at home
- Skye's take on building a sticker aesthetic you'll actually keep
- Sincerelyskye stickers and gear for these placements
- Sources
Great sticker placement ideas for tech and everyday carry
Laptops, phones, water bottles, and headphones are the surfaces most people reach for first, and for good reason: they travel with you, so your stickers get seen. According to Stickers, the most reliable workflow is to start with a large anchor sticker, then fill gaps with medium and small pieces. Avoid vents, screws, and trackpads on laptops: those areas flex or heat up, and adhesive fails faster there.
Best zones by item:
- Laptop lid: The flat center panel or bottom-right corner. Anchor stickers 3–5 inches work well here; 1–2 inch accents fill the gaps.
- Phone case: Flat hard cases are ideal. Placing a sticker inside a clear case protects it completely and lets you swap designs without residue.
- Tablets and headphones: Stick to flat, non-moving panels. Skip the hinge area on foldable devices and the ear cushion area on headphones.
- Water bottles and tumblers: Laminated or outdoor vinyl only. The midsection of a custom tumbler is the sweet spot: flat, visible, and away from the lip and base.
Pro Tip: For a corner cluster on a laptop, place your largest sticker first, then build outward with progressively smaller pieces. Photograph it from arm's length before committing — what looks balanced up close can feel lopsided at normal viewing distance.
Decorating paper goods: notebooks, journals, and planners
Paper goods reward a lighter touch. The stickers move with the cover every time you open and close the book, so adhesion and flexibility both matter. Paper stickers work fine for short-term decoration on journals you'll replace in a few months. For planners or scrapbooks you want to keep long-term, removable vinyl is a better call: it flexes without cracking and lifts cleanly if you change your mind.
Layout options that work on paper goods:
- Centered focal: One medium sticker (2–3 inches) dead center on the cover, nothing else. Clean and intentional.
- Edge framing: Small stickers lined along two or three edges, like a border. Works especially well with sets that share a color palette.
- Row or grid: Matching sticker sets arranged in a tight grid on the inside cover or first page. Great for themed collections.
For scrapbooks meant to last, archival-safe adhesives and protective sleeves keep stickers from yellowing or damaging the paper underneath over time.
Pro Tip: Avoid placing stickers across a spine or near a binding. The repeated flexing cracks the adhesive and the sticker itself within a few weeks.
Sticker ideas for travel gear, helmets, and hard cases
Gear takes a beating, and your stickers need to keep up. Outdoor vinyl and laminated vinyl are the only materials worth using on suitcases, coolers, skateboards, and helmets. Everything else will bubble, peel, or fade within a season. Pinterest boards dedicated to sticker placement show some creative applications on bike helmets and hard equipment cases that hold up well precisely because the stickers are vinyl and placed on flat panels.
Where to place and where to avoid:
- Luggage: Top panel and side panels work best. Avoid the corners near wheels: that area scrapes against conveyor belts and overhead bins constantly.
- Coolers: The large flat sides are perfect. Avoid the lid seal and drain area.
- Skateboards: The underside deck is the classic spot. The top grip tape surface will destroy any sticker quickly.
- Helmets: Flat side panels only. Never cover safety certification labels (DOT, CPSC, SNELL): those are legally required to remain visible and intact.
Pro Tip: On high-friction spots like luggage corners, seal the sticker edges with a thin layer of clear laminate or Mod Podge. It adds maybe 30 seconds of work and doubles the sticker's lifespan on that surface.
Home decor sticker placement: mirrors, walls, and more
Home surfaces open up a different set of possibilities, but they also carry the highest risk of damage if you choose the wrong adhesive. Removable vinyl decals are the right call for walls, light switch plates, and painted furniture: they peel off cleanly without pulling paint, provided the paint has fully cured (at least 30 days after application). Permanent adhesive stickers belong on glass, ceramic, and sealed wood only.
Placement ideas that look intentional:
- Mirror: Frame the mirror with small stickers placed at even intervals along the outer edge. It draws the eye to the mirror itself rather than looking cluttered.
- Fridge: A cluster of craft-themed or seasonal stickers on the upper-right panel reads like a mood board. A custom mug on the counter nearby ties the whole look together.
- Walls above a desk: A loose diagonal arrangement of 3–5 stickers at varying heights creates visual movement without requiring precise alignment.
- Plant pots: Waterproof vinyl stickers on glazed ceramic pots hold up well. Unglazed terra cotta is too porous for reliable adhesion.
Pro Tip: Always test a small piece of removable vinyl on an inconspicuous spot before decorating a full wall. Some flat paints and eggshell finishes pull when the vinyl is removed, even after full cure time.
Vehicle and instrument case placement: what actually works
Glass is almost always the better choice for vehicle stickers. Rear windows, side windows, and tailgates offer smooth, flat surfaces that are easy to clean and don't risk paint abrasion the way body panels do. Decals makes this point clearly: glass protects stickers from the micro-abrasion that painted panels experience from road debris and washing. One firm rule: never place a sticker on the windshield or anywhere that reduces the driver's sightlines. In most states, obstructing the driver's view is a traffic violation.
Placement notes by surface:
- Rear window: The lower corners or a centered placement below the defroster lines. Avoid covering the defroster grid itself.
- Bumper: Flat center section. Avoid the area near tow hooks or license plate hardware.
- Instrument and equipment cases: Flat lid panels are ideal. Use outdoor-grade vinyl and avoid vents or latch hardware where the sticker will flex repeatedly.
Pro Tip: For rented gear or shared equipment cases, use removable vinyl decals instead of permanent stickers. They identify your gear clearly and come off without residue when you return the item.
How to plan sticker layouts that look designed, not random
The difference between a sticker arrangement that looks intentional and one that looks like a junk drawer comes down to choosing a layout strategy before you place anything. Pick one of these four approaches, then select sticker sizes to match.
Four layout strategies:
- Single focal: One large statement sticker, centered or slightly off-center. Everything else stays off the surface. Best for minimalists or a single meaningful piece.
- Corner cluster: A tight group of 4–8 stickers anchored to one corner, with clear empty space on the rest of the surface. The contrast between the cluster and the open space is what makes it look deliberate.
- Grid: Evenly spaced stickers in rows and columns. Works best with sets that share a theme or color palette. Requires measuring.
- Diagonal flow: Stickers arranged loosely along a diagonal axis from one corner to the opposite. Feels dynamic without being chaotic.
Step-by-step workflow:
- Measure the surface and note any zones to avoid (vents, ports, labels).
- Cut small paper placeholders or use painter's tape to mock the layout. Photograph from normal viewing distance.
- Place the anchor piece first.
- Fill with medium accents, then small details.
- Step back, look again, and remove anything that feels redundant.
For spacing: leave roughly 0.25–0.5 inches between small stickers so each one reads clearly. Larger anchor pieces can sit closer together or even overlap slightly at the edges for a layered collage effect. Mixing one glossy or holographic sticker into an otherwise matte arrangement adds contrast without looking busy.
Which sticker materials actually hold up by surface
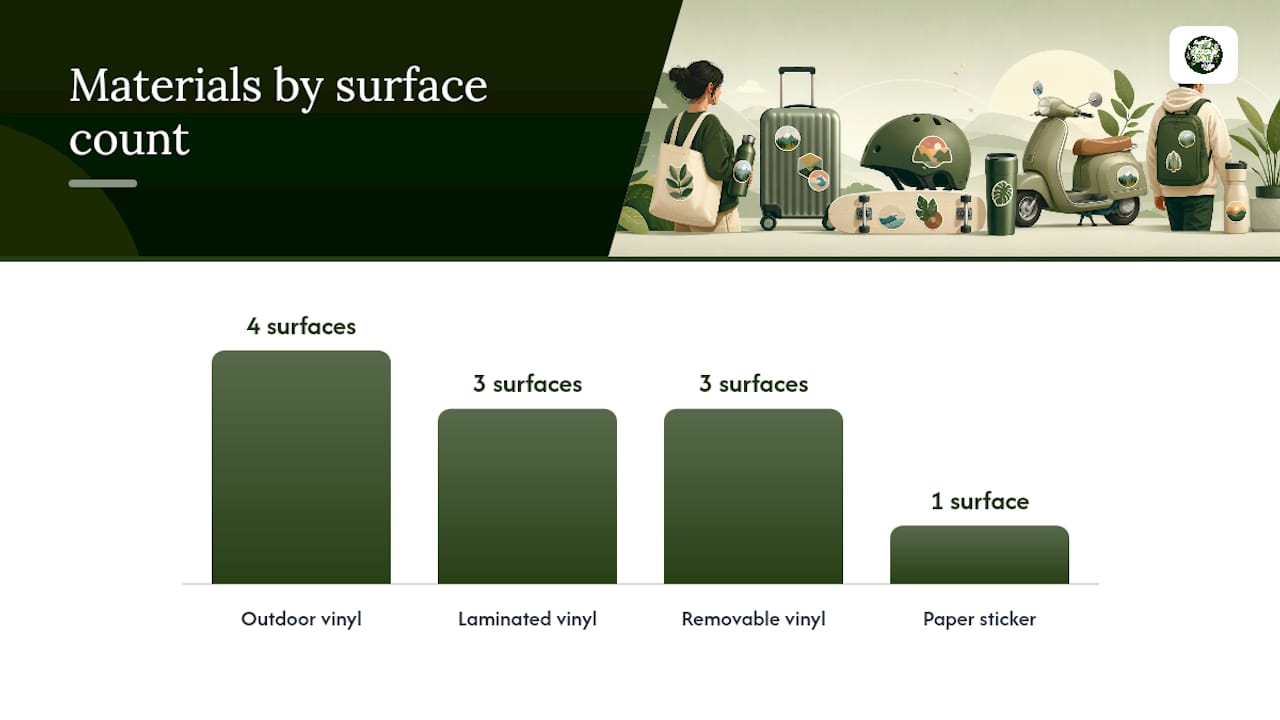
Choosing the right material upfront saves you from re-doing placements in three months. Here's a quick reference:
| Surface | Recommended material | Finish notes |
|---|---|---|
| Laptop lid | Outdoor or laminated vinyl | Matte reduces glare; glossy vs. matte depends on aesthetic |
| Water bottle / tumbler | Laminated or outdoor vinyl | Must be waterproof; dishwasher-safe laminate preferred |
| Car window | Outdoor vinyl | UV-resistant ink extends life |
| Planner / journal | Paper sticker or removable vinyl | Paper for short-term; removable vinyl for keepsakes |
| Wall / painted surface | Removable vinyl decal | Never permanent adhesive on paint |
| Luggage / hard case | Outdoor or laminated vinyl | Seal edges on high-friction spots |
| Fridge / glass | Permanent or removable vinyl | Either works; removable preferred for flexibility |
According to YouStickers' surface guide, laminated or outdoor-grade vinyl is the right call for bottles, coolers, and luggage, while paper stickers are fine for dry indoor packaging or temporary labels. For care: hand-wash stickered bottles rather than running them through a dishwasher unless the sticker is specifically rated dishwasher-safe. Avoid harsh chemical cleaners on any vinyl decal.
How to apply a sticker without bubbles or crooked edges
The cleanest method follows this sequence: clean the surface, position with tape, peel the top half of the backing, smooth down, remove the backing fully, then squeegee from center outward.
Step-by-step application:
- Clean the surface with rubbing alcohol. Let it dry completely, at least 60 seconds. VoilaStickers confirms this step alone reduces premature peeling significantly.
- Hold the sticker over the target spot without removing the backing. Use two small pieces of painter's tape to hold it in position as a preview.
- Peel the backing from the top half only. Press the exposed adhesive down from the top edge, working slowly downward.
- Remove the remaining backing while continuing to smooth downward.
- Use a squeegee, credit card, or the back of a spoon to press from the center outward, pushing air bubbles toward the edges.
- For transfer tape stickers: press firmly, then peel the transfer tape back at a low angle (roughly 30 degrees) rather than straight up.
Pro Tip: In cold weather, vinyl stiffens and adhesive weakens. Warm the sticker with a hair dryer on low for 10–15 seconds before applying. It makes the vinyl more pliable and improves initial adhesion.
Removing stickers and dealing with residue
Removal done right takes about two minutes and leaves no trace. Done wrong, it pulls paint or leaves a sticky ghost that collects lint for months.
Removal steps:
- Apply gentle heat with a hair dryer on low for 20–30 seconds. This softens the adhesive.
- Lift one corner with a fingernail or plastic card. Peel slowly at a low angle, pulling back over itself rather than straight up.
- For any remaining residue, apply rubbing alcohol or a small amount of Goo Gone on a cloth. Let it sit for 30 seconds, then wipe.
- Wipe the surface clean and dry before applying a replacement sticker.
A few care rules worth keeping:
- Hand-wash stickered water bottles and tumblers. Dishwasher heat and detergent degrade adhesive even on vinyl.
- Avoid scrubbing directly over a sticker with abrasive sponges.
- Removable vinyl is the right choice any time you expect to reposition or replace stickers within a year. Permanent adhesive is for surfaces you won't need to restore.
DIY workflow for making durable custom stickers at home
You can get dishwasher-resistant custom stickers at home by printing on waterproof vinyl, laminating, and cutting precisely. The material choice matters more than the printer.
Checklist-style workflow:
- Design file: Use a vector file (SVG, AI) or a high-resolution PNG at 300 DPI minimum. Low-res files print with visible pixelation at sticker size.
- Print: Use an inkjet printer with waterproof vinyl paper (Avery or similar). Laser printers work but require laser-compatible vinyl.
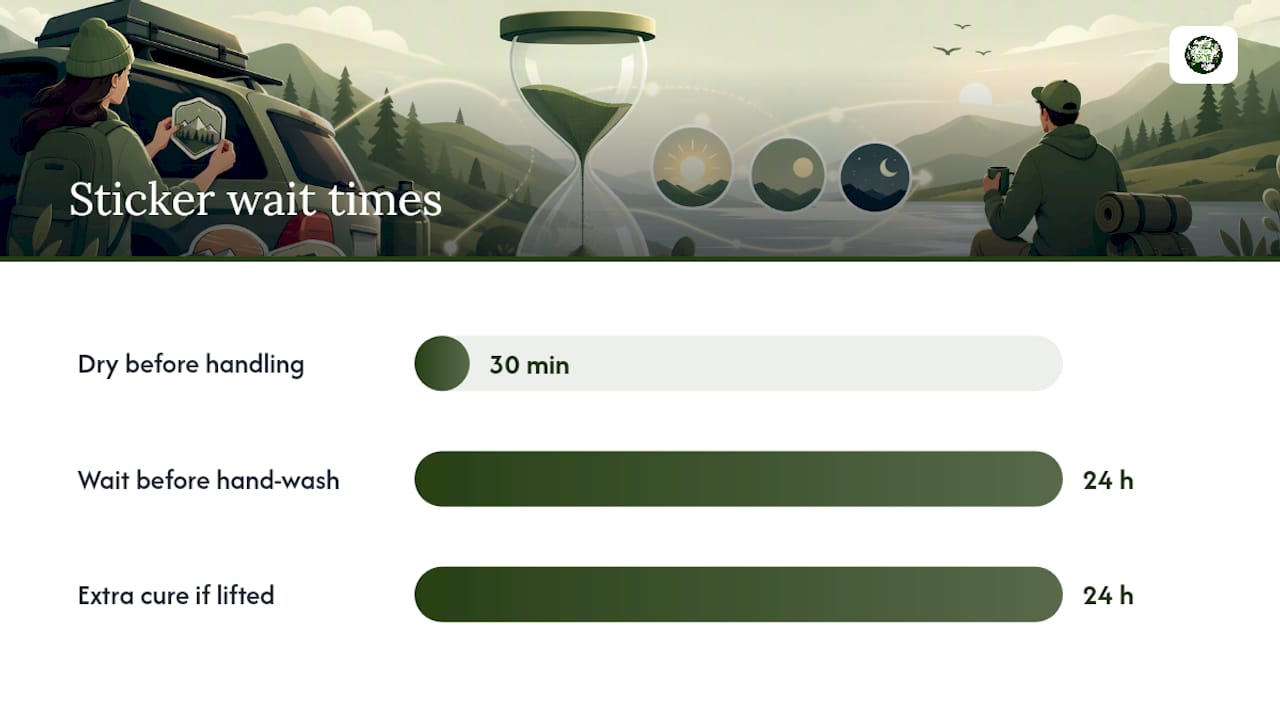
- Dry: Let the print dry for at least 30 minutes before handling.
- Laminate: Apply clear contact paper or a laminate sheet over the printed surface. This step is what makes stickers water-resistant and durable enough for bottles and laptops.
- Cut: Use a Cricut, Silhouette, or X-Acto knife for clean edges. Precise cutting improves both appearance and adhesion at the sticker's perimeter.
- Edge seal (optional but recommended): Run a clear nail polish or thin varnish along the cut edges for high-traffic placements.
Durability test: Hand-wash the stickered item after 24 hours. If edges lift, the laminate didn't bond fully; press edges down with a squeegee and let cure another 24 hours before the next wash. For anything going in a dishwasher, professional printing on die-cut outdoor vinyl is more reliable than home printing.
Pro Tip: Mix one larger, detailed anchor sticker with several small accent stickers in your DIY set. A single glossy or holographic piece in an otherwise matte set adds contrast and makes the whole arrangement feel more intentional.
Skye's take on building a sticker aesthetic you'll actually keep
The conventional advice is to "express yourself" and "have fun with it," which is true but not very useful when you're staring at a blank laptop lid. What actually works is treating your first placement like a small design decision: pick one surface, pick one layout strategy from the options above, and commit to it before buying more stickers.
The craft community at Sincerelyskye leans toward corner clusters and centered focal pieces on everyday carry items, with seasonal and themed stickers rotating in on planners and journals. That approach keeps things feeling fresh without requiring a full redesign every few months. The stickers that tend to stay up longest are the ones placed with intention on the right material for that surface, not the ones placed impulsively on whatever was nearby.
One thing people consistently underestimate: the surface prep step. A 60-second wipe with rubbing alcohol before any placement is the single highest-return action in this whole guide. Skip it and even good vinyl will start lifting at the corners within weeks.
Sincerelyskye stickers and gear for these placements
Sincerelyskye carries vinyl stickers, magnets, and coordinating gear sized and finished for exactly the placements covered here. The logo sticker is outdoor vinyl, which means it holds up on water bottles, laptops, and luggage without laminating. Magnets work on fridges and metal surfaces where you want zero adhesive commitment. The craft-themed designs fit the aesthetic whether you're building a corner cluster on a planner or a centered statement on a tumbler.

The Sincerelyskye gear collection also includes apparel and accessories that pair naturally with the sticker aesthetic, from cozy tees to mugs. Browse the full shop at sincerelyskye.com to find stickers, seasonal collections, and custom pieces that match the layouts and surfaces in this guide.
Sources
- Where to Put Stickers: 75 Ideas for Laptops, Cars, Packaging, Bottles, and More - YouStickers
- Stickers
- Where Is the Best Place to Put Stickers? - VoilaStickers
- The Perfect Placement: Where To Put Stickers | Blog
- DIY laptop stickers ideas — WonderfulDIY