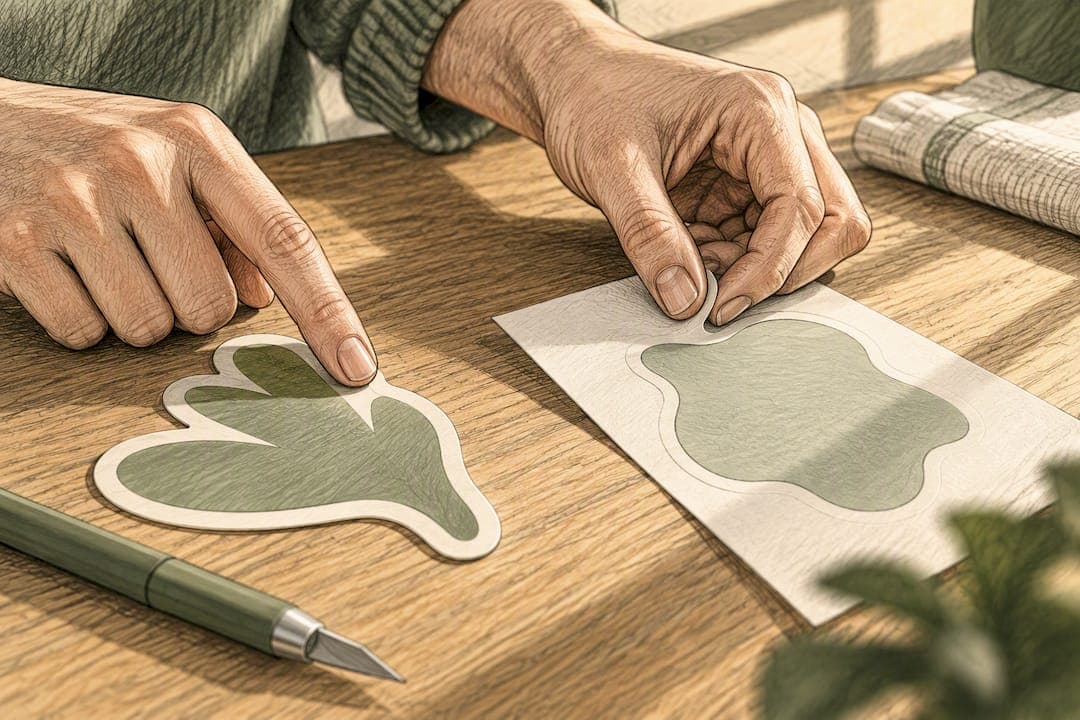
A die cut sticker is cut through both the sticker and its backing to match the exact shape, while a kiss cut sticker is cut only through the top layer so the backing stays whole. Pick die cut when you want a single, premium-looking sticker for retail or gifting. Pick kiss cut when you want sheets of stickers that peel easily and print efficiently.
TL;DR:
- Kiss cut stickers are easier to peel from sheets and travel flat with their backing, making them ideal for multi-design packs.
- Die cut stickers are fully cut through, producing a shaped, standalone sticker that looks more finished and is better for single, premium designs.
- Using a shallow blade for kiss cuts means it can be switched on equipment without retooling, but thicker or laminated materials may require adjustments.
- Die cutting involves custom tooling, which adds setup costs but results in cleaner edges and more durable, outdoor-friendly stickers.
- For small batches or complex shapes, ordering a proof beforehand helps prevent costly mistakes and ensures proper spacing and cut accuracy.
Table of Contents
- Die cut vs kiss cut at a glance
- What is kiss cut: process, materials, and how it behaves
- What is die cut: through-cut tooling and the finished look
- Weighing the trade-offs: pros and cons of each method
- How to choose: a quick decision checklist
- File setup: bleed, spacing, and cut paths that avoid delays
- Skye's practical notes for makers
- What makers usually pick and why it sticks
- Where Sincerely Skye fits if you need a hand
- Sources
- FAQ
Die cut vs kiss cut at a glance
Kiss cut means the blade slices through the sticker material but stops before it reaches the backing, so the whole sheet stays intact until someone peels a piece off. Die cut means the blade goes all the way through the sticker and the backing, producing a single piece that already matches the sticker's final shape when it lands in your hand.
- Cut depth: Kiss cut is a partial cut; die cut is a full through-cut.
- Backing result: Kiss cut leaves one continuous liner; die cut produces a shaped backing that matches the sticker.
- Peel and handling: Kiss cut stickers peel off a shared sheet; die cut stickers arrive individually ready to apply.
- Typical look: Kiss cut suits multi-design sheets; die cut suits a single, contoured design.
- Best for: Kiss cut fits sticker packs and sampler sheets, while die cut fits standalone decals and shop-ready singles, according to Shopify's comparison.
- Cost pattern: Die cut can involve more setup for a custom shape, while kiss cut sheets often print more efficiently across a layout.
What is kiss cut: process, materials, and how it behaves
Kiss cutting happens on the same equipment used for die cutting, just with a shallower blade depth or lighter pressure so the cut stops at the top layer, according to Strouse. That makes it a setting choice rather than a separate machine or technology, which is why converters can often switch between the two without retooling.
Kiss cutting works well on most standard vinyl and paper sticker stocks, though very thick or heavily laminated materials can make it harder to control cut depth without scoring the liner underneath. Thinner films with a reliable liner give the cleanest partial cuts.
- The die presses just far enough to separate the top sticker layer from the backing sheet.
- The backing stays in one piece, so multiple stickers can share a single sheet.
- Buyers peel each sticker off by hand, which is why Rubber Resource notes kiss cutting is common for stickers meant to stay together until use.
In shipping, kiss cut sheets travel flat and protected, since the intact backing acts as a shield for the printed surface until the customer is ready to peel.
What is die cut: through-cut tooling and the finished look
Die cutting uses a custom die, whether a steel rule die or a rotary die, that presses all the way through both the sticker material and its backing in one pass. The blade meets the backing at full pressure rather than stopping short, which is the core mechanical difference from kiss cutting.
This method suits thicker materials, durable outdoor vinyl, and any design where you want a decal that holds up to repeated handling. It's also the standard choice when a sticker needs to look finished the moment it leaves the sheet, since there's no extra backing border framing the shape.
- Works well for premium single stickers sold individually rather than in sheets.
- Handles thicker or laminated stock better than a partial cut, since the die is set to cut fully through.
- Gives product photos a cleaner edge, since the sticker's outline is visible against the backing before it's even applied.
- Suits packaging and decals where durability matters as much as looks.
Because the final shape is already visible on the backing, die cut stickers tend to photograph better for online listings and look more finished on a retail shelf or at a craft table.
Weighing the trade-offs: pros and cons of each method
Every choice here is a trade between convenience and presentation.
- Kiss cut pros: Easier peeling straight off a shared sheet, a protective backing edge during shipping, efficient layouts for multiple small designs.
- Kiss cut cons: Less polished on its own since the backing frames every design, and a full sheet can be harder to photograph as a standalone product.
- Die cut pros: A cleaner finished shape, stronger presentation for photos and displays, no extra backing border to distract from the design.
- Die cut cons: Custom die setup adds a step before printing, and very small or fragile pointed shapes can be less forgiving to cut cleanly on a shared sheet.
How to choose: a quick decision checklist
Before you place an order, walk through these questions in order.
- Decide the intended use. Are you selling sheet bundles, single premium stickers, or roll labels for packaging?
- Estimate your quantity. Compare a small sample run against a bulk order, since die setup costs behave differently than a kiss-cut sheet layout.
- Think about presentation. If the sticker needs to look complete in a product photo or on a shelf, die cut usually serves that goal better.
- Ask your printer directly. Request a sample proof, ask whether they can reuse a die for future orders, and confirm their minimum spacing requirements before you finalize art.
Pro Tip: Order one small proof run before committing to a full batch, especially if your design has thin points or tight inside corners.
File setup: bleed, spacing, and cut paths that avoid delays
Getting your file right the first time saves back-and-forth with your printer. For kiss-cut sheets, file-setup guidance recommends around 2 to 3 millimeters of bleed and clear space between individual stickers, while full die-cut singles typically need roughly a 3 millimeter safe margin, with more room for laminates or outdoor decals.
- Kiss-cut files need two vector paths: one for the sticker's cut outline and one marking the sheet or trim boundary, so the converter knows where the final sheet edge falls.
- Die-cut files need a single contour cut path that traces the sticker's final shape.
- Complex or pointed shapes benefit from extra spacing, with practitioner guidance suggesting increased distance between adjacent stickers to keep the die from pivoting awkwardly.
- Material can shrink slightly after lamination, so leave a touch of extra margin around fine details.
- Printers typically run basic quality checks such as visual imprint inspection and pressure monitoring to catch an incomplete cut or an embossed liner before shipping.
Skye's practical notes for makers
When you're laying out a sheet for both production and product photos, group similar shapes together and leave breathing room around anything with fine points. If you're testing a new design, order a small sample run before paying for a full die setup, since a proof catches spacing issues cheaply. For die-cut singles, a simple kraft backing card or clear sleeve makes the shape pop at a craft fair table. For more on presentation once your stickers arrive, our post on sticker placement ideas covers care and display, and our matte versus glossy breakdown helps you match finish to material.

What makers usually pick and why it sticks
In my experience following the craft community, sheets win for variety packs and gifting, while a single die-cut design wins when someone wants one shape they'll actually keep on a laptop or water bottle. The peel and the presentation are what people remember, not the technical name for the cut.
— Skye
Where Sincerely Skye fits if you need a hand
If you'd rather skip the file setup entirely, Sincerely Skye Logo Creation can turn your idea into print-ready artwork with proper cut paths already built in, priced at a one-off fee. It's a straightforward way to hand off the technical part while you focus on the design itself.
- Request custom artwork or a proof through the custom services page.
- Browse ready-made craft designs and merchandise on the Sincerely Skye shop for inspiration on presentation and finish.
- For bulk custom shapes beyond stickers, like laser-cut décor pieces, Signature Laser Designs is a partner worth a look for bulk ordering considerations.
Reach out through the custom services page to get a quote on your next sticker project.
Sources
- Kiss Cut vs Die Cut: What's the Difference? | Rubber Resource
- Die Cut vs. Kiss Cut: Are They the Same? | Strouse
- Die Cut Sticker Printing: Cleaner Edges File Setup Tips
- Kiss Cut vs. Die Cut Stickers: How To Choose the Right Option - Shopify
FAQ
Why is die cut more expensive than kiss cut?
Die cut often costs more upfront because a custom die needs to be made for the exact shape, while kiss-cut sheets can be laid out more efficiently across the same material. At high volumes, that setup cost spreads out, but for small batches it tends to make die cut the pricier option.
What is the difference between kiss cut and die cut?
Kiss cut slices through only the top sticker layer and leaves the backing sheet whole, while die cut slices through both the sticker and the backing to produce a single shaped piece. Both are typically done on the same die-cutting equipment, with the difference coming down to blade depth and pressure, according to Strouse.
Why is it called kiss cut?
The name comes from the blade just "kissing" the surface deep enough to cut the top layer without cutting through the backing underneath. It's a light, controlled touch compared to the full pressure used in a standard die cut.
Can you kiss cut on any surface?
Kiss cutting works best on standard vinyl and paper sticker stocks with a reliable liner, but very thick or heavily laminated materials can make it harder to control the cut depth. If your design uses a thicker or textured material, ask your printer whether kiss cutting is a good fit before finalizing your order.