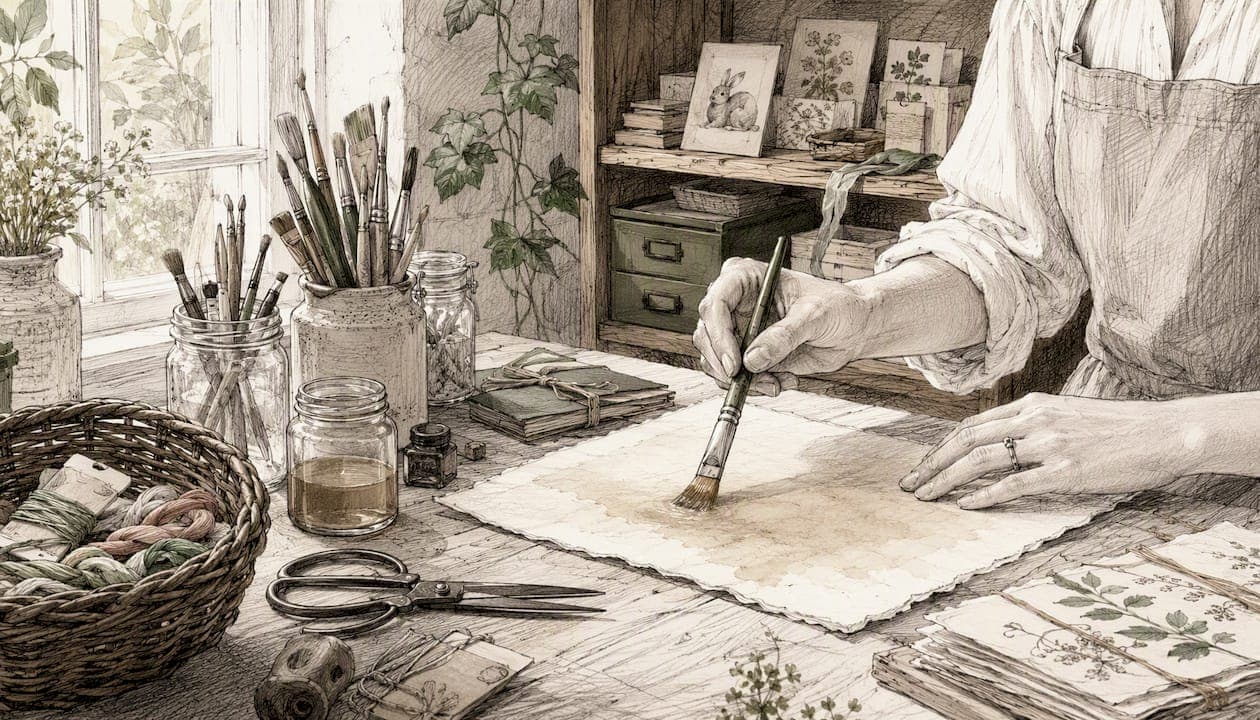
A retro crafting aesthetic means using analog textures, deliberate age effects, and era-specific motifs (think mustard yellows, wood grain, geometric prints) to make handmade pieces look pulled from the 1950s through the 1990s. The fastest way in is a decoupaged sewing-pattern lamp, upcycled CD coasters, and a collage built inside a thrifted frame. All three take under an hour and use supplies most crafters already own.
Before anything else, grab three things: sharp craft scissors, a bottle of Mod Podge (or any decoupage glue), and a fine-grit sanding block. Those three tools carry you through most of the projects in this guide.
- Decoupaged sewing-pattern lamp — layer vintage pattern tissue over a plain shade for an instant glow-through look.
- Upcycled CD coasters — sand, paint, and decoupage old CDs into kitschy drink coasters.
- Thrifted-frame collage — combine postcards, fabric scraps, and old photos behind glass for wall art.
Key Takeaways
Retro crafting works when you combine one clear decade's colors and motifs with a deliberate age technique, applied to a material you already have on hand.
| Point | Details |
|---|---|
| Pick one era first | Choose a single decade's palette and motifs before starting so the piece stays coherent. |
| Choose a material to match your stash | Paper, fabric, wood, and found objects each open up different beginner projects. |
| Try one aging technique | Distressing, tea staining, or decoupage layering all deliver convincing age with basic supplies. |
| Source before you shop new | Thrift stores and reproduction supplies both work; inspect vintage finds for mildew and brittleness. |
| Seal paper projects with UV-resistant topcoat | A non-yellowing sealant protects decoupaged pieces like the sewing-pattern lamp from discoloring. |
| Start with the lamp project | The vintage sewing-pattern lamp is the easiest first project, and Sincerelyskye's crafters collection makes a fitting next stop once you catch the retro-craft bug. |
Table of Contents
- What Does a Retro Crafting Aesthetic Actually Look Like?
- Retro Craft Projects Organized by Material
- How to Fake Age and Build Real Texture
- Which Colors and Motifs Belong to Which Decade?
- Where to Find Real (and Reproduction) Vintage Materials
- Make This Weekend: A Vintage Sewing-Pattern Lamp
- Why Retro Crafting Is Having a Real Moment
- Why This Aesthetic Sticks With Me
- Wear the Craft Room Identity, Not Just the Projects
- Sources
What Does a Retro Crafting Aesthetic Actually Look Like?
Retro crafting borrows its visual language from specific decades rather than a vague sense of "old." A piece reads as vintage when it combines three things: an analog surface (paper, fabric, wood grain), a deliberate age effect (yellowing, distressing, staining), and at least one recognizable era motif (a starburst pattern, a harvest gold palette, a geometric wallpaper print). Miss any one of those, and a project just looks generic rather than nostalgic.
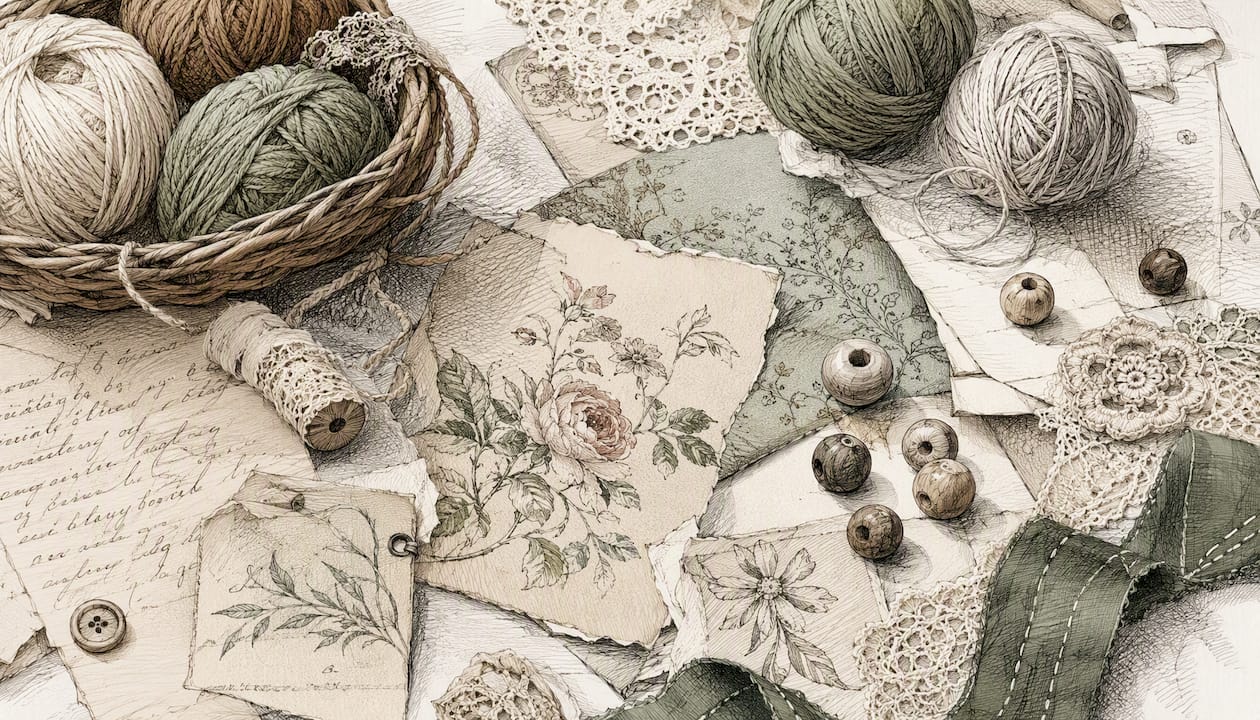
This is different from "shabby chic" or generic farmhouse styling, which lean rustic without pinning down a decade. Retro crafting is specific. A 1970s macrame piece and a 1950s atomic-print coaster are both "vintage," but they're not interchangeable, and mixing eras without intention is the fastest way to make a project look like a costume rather than a curated piece.
The category has real momentum right now. The craftcore movement, which emerged as a distinct design trend by mid-2025, leans into Risograph printing, letterpress fonts, and zine-style layouts as a direct reaction against overly polished digital design. That same appetite for texture and imperfection is what's driving vintage sewing-pattern art, tea-stained journal pages, and hand-cut paper collage back into style.
Retro Craft Projects Organized by Material
Picking a project usually comes down to what's already sitting in your craft bin. Here's a curated set of ideas organized by material, so you can start with what you have instead of shopping first.
Paper and ephemera projects
- Vintage pattern wall art: Frame a full sewing pattern sheet as a graphic art piece. Materials: pattern tissue, a shadow box frame, spray adhesive. Time: 20 minutes. Difficulty: beginner.
- Tea-stained recipe cards: Age blank cards with tea or coffee, then hand-letter a family recipe. Materials: cardstock, black tea bags, a fine-tip pen. Time: 30 minutes plus drying. Difficulty: beginner.
- Zine-style scrapbook: Bind photocopied ephemera and hand-drawn art into a mini zine, echoing the craftcore aesthetic's love of xeroxed, layered layouts. Materials: cardstock, a stapler, old magazine clippings. Time: 1 hour. Difficulty: intermediate.
- Postage-stamp collage art: Group vintage or reproduction stamps by color into a framed grid. Materials: stamps, cardstock, glue dots. Time: 25 minutes. Difficulty: beginner.
Substitute tip: if you can't find real vintage ephemera, sepia-toned scrapbook paper and printable "distressed" digital paper packs mimic the look convincingly. Photograph these flat on a wood-grain surface with warm, indirect light. That single choice does more for the "vintage" feel than the project itself.
Fabric and textile projects
- Patchwork throw pillow: Piece together scraps of calico or gingham fabric in a period print. Materials: fabric scraps, stuffing, a needle and thread. Time: 1.5 hours. Difficulty: intermediate.
- Embroidered hoop art: Stitch a retro floral or mushroom motif into an embroidery hoop for wall display. Materials: embroidery hoop, floss, muslin. Time: 2 hours. Difficulty: intermediate.
- Macrame plant hanger: A 1970s staple that's fully back in rotation. Materials: cotton cord, a wooden ring. Time: 45 minutes. Difficulty: beginner.
- Bandana quilt square: Repurpose vintage-print bandanas into a quilted table runner. Materials: bandanas, batting, backing fabric. Time: 2 hours. Difficulty: advanced.
Substitute tip: reproduction feed-sack fabric and calico prints sold at most fabric stores look nearly identical to genuine 1950s cottons at a fraction of the price. Style fabric pieces draped over a wooden chair or stacked in an open basket rather than laid flat. It reads more like a lived-in home than a staged product shot.
Wood and small furniture projects
- Painted TV tray tables: Refinish thrifted metal or wood TV trays with a period-appropriate color and hand-painted trim. Materials: TV tray, chalk paint, brush. Time: 2 hours. Difficulty: intermediate.
- Sanded and stained cutting board: Age a plain wood board with a walnut stain and distressed edges. Materials: wood board, wood stain, sandpaper. Time: 1 hour plus drying. Difficulty: beginner.
- Custom arcade-style cabinet: An ambitious build that blends woodworking with retro graphics and, if you want, working electronics. Careful planning and finishing details create an authentic arcade vibe even when the internals are entirely modern. Materials: plywood, vinyl decals, hinges, paint. Time: multiple weekends. Difficulty: advanced.
Substitute tip: if hardwood feels intimidating, MDF board takes stain and paint just as well for smaller pieces. Photograph finished wood pieces against a plain wall in natural daylight to let the grain and stain color show honestly.
Found objects and small upcycles
- CD mosaic coasters: Cut old CDs into shards and set them in resin or glue onto cork coasters. Materials: old CDs, cork rounds, adhesive. Time: 40 minutes. Difficulty: beginner.
- Retro toy hardware mods: Hobbyists have shown that repurposing a modern toy's internal hardware into a functional retro device keeps the chunky, playful shell while adding real function underneath. Materials vary by project. Time: several hours. Difficulty: advanced.
- CRT-style display project: Pairing an old CRT monitor with a Raspberry Pi can recreate a period-appropriate cable bulletin board channel for a genuinely immersive retro room accent. Materials: CRT monitor, Raspberry Pi, HDMI-to-composite adapter. Time: a weekend. Difficulty: advanced.
Substitute tip: thrift stores are the best source for CDs, old electronics, and small hardware. Style found-object pieces next to their "before" counterpart in photos. The contrast sells the transformation better than the finished piece alone.
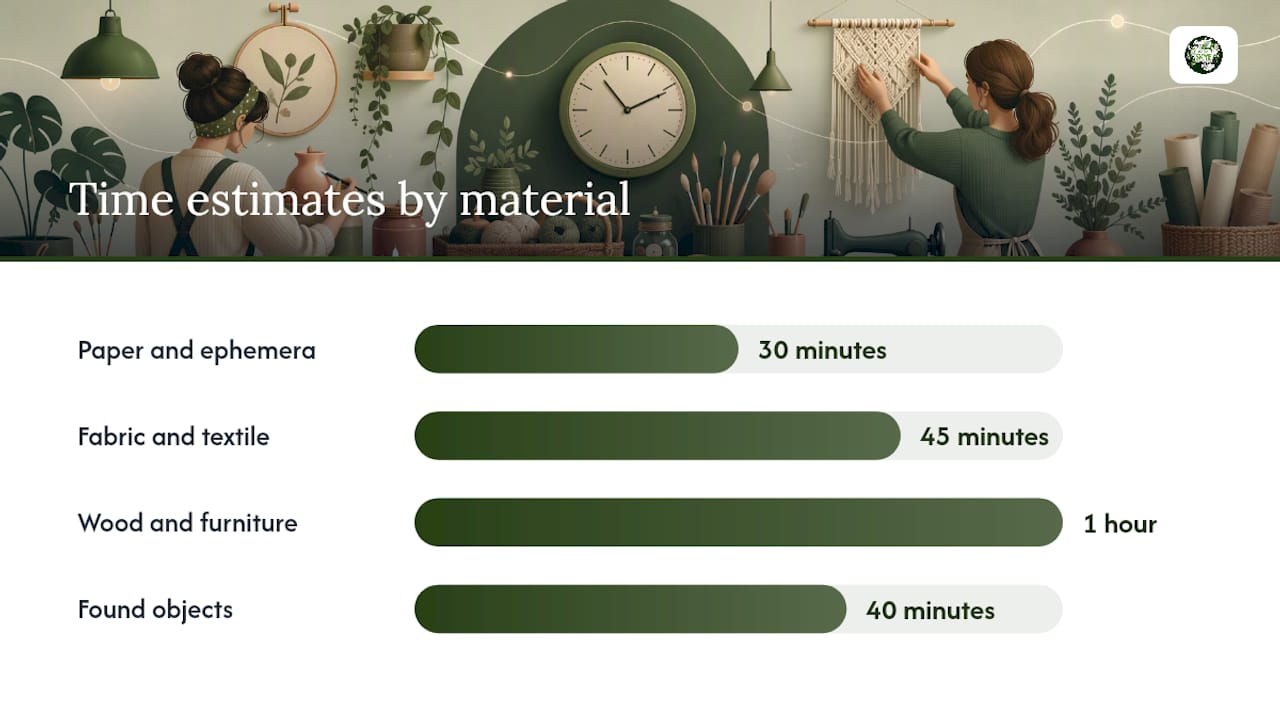
| Material Group | Beginner-Friendly Project | Time Estimate |
|---|---|---|
| Paper and ephemera | Tea-stained recipe cards | 30 minutes |
| Fabric and textile | Macrame plant hanger | 45 minutes |
| Wood and furniture | Sanded and stained cutting board | 1 hour |
| Found objects | CD mosaic coasters | 40 minutes |
How to Fake Age and Build Real Texture
Getting a convincing worn look comes down to a handful of repeatable techniques. Master these four and you can apply them across almost any project in this guide.
- Distressing: Sand edges and corners unevenly with a fine-grit sanding block, focusing on spots that would naturally wear first, like corners and handles. Follow with a thin paint wash in a contrasting tone, then wipe most of it back off so it settles into the grain and scratches.
- Tea and coffee staining: Steep strong black tea or instant coffee, then dab or dip paper and light fabric. Blot unevenly rather than soaking evenly. Even color reads as fake; blotchy color reads as decades old.
- Decoupage layering: Build up two or three thin layers of paper ephemera with Mod Podge, letting each layer dry fully before adding the next. This is exactly the method behind layering vintage sewing patterns into a lamp for a luminous, double-sided effect once it's lit from inside.
- Thin glazing and transparent washes: Apply diluted paint or ink in multiple passes rather than one heavy coat. Patience in layering is what separates authentic-looking papercraft aging from a project that just looks dirty, since subtle depth builds slowly, the same way real vintage documents fade unevenly over years.
Ventilation matters more than most crafters expect. Wood stains and spray sealants release fumes that build up fast in a closed craft room, so work near an open window or outside when you're staining or sealing. For paper pieces you want to last, finish with a UV-resistant, non-yellowing topcoat rather than a standard varnish, since regular sealants can yellow and undercut the exact vintage look you're going for.
Pro Tip: Uneven edge aging looks more convincing than perfectly distressed corners. Sand two adjacent edges heavily and leave the opposite two nearly untouched, since real wear never happens symmetrically.
One more thing worth knowing before you start sanding and staining everything in sight: perfection actually works against you here. Uneven staining, a slightly jagged sanded edge, or a pattern piece that doesn't quite line up all read as genuine age. A project that's too tidy tips into "costume" territory fast.
Which Colors and Motifs Belong to Which Decade?
Picking a decade before you start a project keeps the finished piece coherent instead of a mash-up of eras that don't belong together.
- 1950s: Pastel pink, mint green, and cream as your base, with cherry red or black as an accent. Motifs: atomic starbursts, boomerang shapes, gingham checks, poodle silhouettes.
- 1960s: Olive green, mustard yellow, and burnt orange dominate, paired with white for contrast. Motifs: daisies, mod geometric circles, psychedelic swirls, op-art stripes.
- 1970s: Harvest gold, avocado green, and warm brown as primaries, with cream as relief. Motifs: macrame knots, mushrooms, rainbows, wood paneling patterns, shag textures.
- 1980s: Hot pink, teal, and electric purple as accents against black or white bases. Motifs: neon geometric shapes, memphis-style squiggles, cassette tapes, arcade graphics.
- 1990s: Jewel tones like teal, purple, and forest green mixed with black. Motifs: chunky florals, grunge textures, disposable cameras, dial-up era icons.
| Era | Core Colors | Signature Motifs |
|---|---|---|
| 1950s | Pastel pink, mint, cream, cherry red | Atomic starbursts, gingham, poodles |
| 1960s | Olive, mustard, burnt orange | Daisies, mod circles, op-art stripes |
| 1970s | Harvest gold, avocado, brown | Macrame, mushrooms, wood paneling |
| 1980s | Hot pink, teal, electric purple | Memphis squiggles, arcade graphics |
| 1990s | Teal, purple, forest green, black | Chunky florals, grunge texture |
Use your primary color for the majority of a piece, a secondary tone for a moderate amount, and reserve your accent color for small details like stitching or trim. This approach helps keep a project from looking like a paint chip sample. When you mix patterns within one era, pair a geometric print with a solid or a small-scale floral rather than two bold patterns at once. This is currently being described online as the vibestalgia trend: taking recognizable retro objects like scrunchies, sticker books, and retro fonts and giving them fresh, active use in modern crafts rather than treating them as museum pieces.
Where to Find Real (and Reproduction) Vintage Materials
Sourcing is half the battle with retro crafting, and it's worth knowing what's actually worth hunting down versus what you can substitute with new supplies.
- Check thrift stores on restock days (often early in the week) for the freshest selection of fabric, patterns, and small furniture.
- On Etsy and eBay, search specific terms like "vintage Simplicity pattern," "70s barkcloth fabric," or "MCM ceramic planter" rather than generic words like "retro," which returns mostly reproductions mixed in.
- At flea markets, arrive within the first hour for the best condition items, and always ask sellers if pricing is negotiable on bundles.
- Inspect any vintage fabric or paper for mildew smell, foxing (brown age spots on paper), and brittleness before buying. Sun damage or water stains that go beyond light yellowing usually aren't salvageable.
- For reproduction supplies, craft stores carry sepia-toned scrapbook paper, feed-sack print fabric bundles, and pre-aged cardstock that mimic the vintage look without the hunt.
Reproductions genuinely have a place here. Well-made reproduction ephemera and fabric deliver the same visual character as originals while leaving scarce authentic pieces for collectors and archives who need them more. If you do bring home genuine vintage paper or textiles, isolate them from the rest of your stash for a few days first. Old adhesives and mildew spores can transfer to nearby supplies, and a quick vinegar-water wipe on hard surfaces (never on paper) handles most mild mildew before it spreads.
Make This Weekend: A Vintage Sewing-Pattern Lamp
This is the single most approachable project in this guide, and it photographs beautifully once it's plugged in.
Materials needed:
- A plain paper or fabric lampshade (thrifted or new)
- 3 to 5 vintage sewing pattern sheets, or reproduction pattern paper if originals are hard to find
- Mod Podge or a similar decoupage glue
- A foam brush
- Scissors
- A UV-resistant, non-yellowing sealant spray
Steps:
- Tear or cut your pattern sheets into irregular pieces rather than clean squares. Irregular edges blend together better once layered.
- Brush a thin layer of Mod Podge directly onto the lampshade in a small section.
- Press your first pattern piece onto the wet glue, smoothing from the center outward to push out air bubbles.
- Brush a thin coat of glue over the top of that piece before adding the next, overlapping edges slightly.
- Repeat around the entire shade, working in small sections so the glue doesn't dry before you place each piece.
- Let the shade dry completely, ideally overnight, before handling it again.
- Finish with two light coats of a UV-resistant, non-yellowing sealant, since sealing the finished piece is what preserves the paper long term and keeps it from becoming brittle or discolored under a hot bulb.
- For a minimalist look, use just one or two large pattern pieces with visible white space between them.
- For a dense, layered look, cover the entire shade in overlapping fragments so no base material shows through.
- Estimated total time: 2 to 3 hours including drying time.
- Photograph the finished lamp in a dark room with the bulb on. The backlighting turns the layered pattern pieces into a genuinely luminous, almost stained-glass effect that a daylight photo won't capture.
If this project hooks you on paper crafting, the same layering logic scales up to far more ambitious builds, including the kind of detailed miniature architectural models hobbyists are tackling in 2026.
Why Retro Crafting Is Having a Real Moment
This isn't a passing aesthetic blip. The craftcore movement's rise by mid-2025 reflects a broader pushback against algorithm-driven, overly polished digital content. Risograph printing, letterpress type, and zine layouts are popular precisely because they carry visible human fingerprints: slight misregistration, ink variation, imperfect trims. Crafters are chasing the same feeling with tea-stained paper and hand-cut collage.
Borrow the cues, not the exact artifact. Study a decade's color ratios and motif vocabulary, then apply them to a project that reflects your own taste rather than tracing an existing pattern piece for piece. Copying an artist's specific design or reproducing a copyrighted vintage print for resale crosses from inspiration into infringement, so keep direct reproductions for personal use and build original combinations for anything you plan to sell or share widely.
Why This Aesthetic Sticks With Me
Retro crafting appeals to me because it rewards patience over speed, which feels increasingly rare. There's something genuinely satisfying about a project that can't be rushed: the tea stain needs time to set, the decoupage layers need to dry between coats, the sanded edge needs a light hand instead of an aggressive one. That slowness is the whole point, and it's exactly what the current craftcore wave is reacting toward.
My one personal habit that's made the biggest difference is keeping a dedicated "pattern stash" organized by decade rather than by fabric type. When a project idea hits, I'm not digging through a mixed pile. I pull the 1970s folder and everything already coordinates. It's a small system, but organizing a craft space around visible, era-sorted storage does double duty: it speeds up your workflow and turns your supplies into part of the room's decor instead of clutter hiding in a bin.
Wear the Craft Room Identity, Not Just the Projects
If you're the kind of person who tea-stains paper for fun on a Tuesday night, your closet should probably know it. Sincerelyskye started as a store for exactly that impulse: cozy, craft-themed gear that says "I make things" without you having to explain the hobby to anyone.
A few pieces worth a look if the retro-craft life is your life: the In My Cozy Craft Era V-neck works as easy studio wear or a gift for the crafter who's always got glue on their fingers. The Ribbon Hoarders Vintage Sweatshirt leans into the exact sewing-room humor this article is built around, and the Pink Checkered Heart Mug makes a low-cost, giftable addition for a crafting friend's holiday list. Sincerelyskye is the publisher of this guide and sells all of these directly. If any of it fits your bench or your closet, browse the full crafters collection and pick out something for your next studio session.
Sources
- The rise of craftcore in graphic design: Risograph, letterpress fonts, and zine vibes
- DIY: Vintage sewing pattern lamp tutorial
- Build an arcade cabinet: DIY plans and finishing tips